Create-dynamic-dns-in-cpanel: Difference between revisions
(Created page with "<big>Dynamic DNS in cPanel gives you a special URL that you can call from a device/script. Each time it’s called, your chosen subdomain is updated with your current public IP, making your domain always point to your home/server even with a changing ISP address.</big> <big>Devices such as network routers can use dynamic DNS to notify servers when their IP address changes. The gadget connects to a unique web address, authenticates itself, and then delivers the new IP a...") |
(No difference)
|
Latest revision as of 05:18, 4 September 2025
Dynamic DNS in cPanel gives you a special URL that you can call from a device/script. Each time it’s called, your chosen subdomain is updated with your current public IP, making your domain always point to your home/server even with a changing ISP address.
Devices such as network routers can use dynamic DNS to notify servers when their IP address changes. The gadget connects to a unique web address, authenticates itself, and then delivers the new IP address. When someone attempts to connect again, cPanel changes the zone records, and they obtain the correct IP address.
Let us follow the steps to create the Dynamic DNS in cPanel:
Step-1
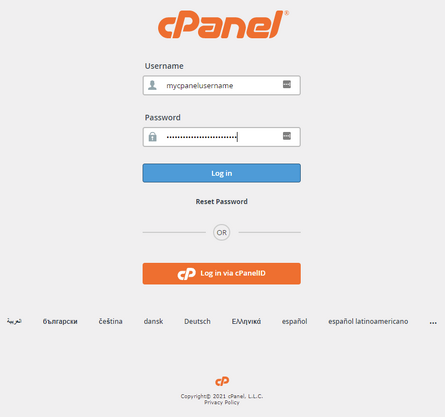
Log in to cPanel.
Steps-2
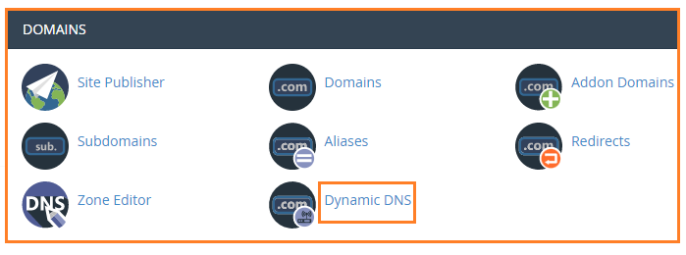
Choose the “Domains” section and click on the “Dynamic DNS” option.
Step-3
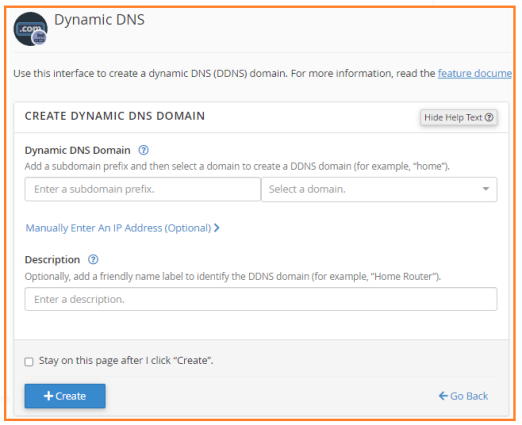
You will be taken to the “Dynamic DNS” page.
Step-4
Click on the “+create” button on the right-hand side of the screen.
Step-5
Now enter the “Dynamic DNS Domain”.
Step-6
You will see two boxes:
- Enter a Subdomain prefix
- Select a domain
Step-7
Enter the “Description” as shown below.
Step-8
Tick the box saying “Stay on this page after I click “Create”.”
Step-9
Finally click on the “+create” button.
Step-10
You will get a success message.
Step-11
You can see the “Dynamic DNS” created.


